

Best Lake Tahoe Hikes: 13 Trails, Maps & Access
Researched by the I Love Lake Tahoe Editorial Team. Route sources and access notices checked October 25, 2026. These are researched comparisons, not a field report.
The best hikes in Lake Tahoe range from short meadow walks to all-day mountain climbs. Beginners can explore Rainbow Trail, Spooner Lake, Tahoe Meadows, or Big Meadow. Hikers who want a view without committing an entire day can consider Picnic Rock, Eagle Rock, or Vikingsholm. Experienced hikers can tackle longer sections of the Rubicon Trail, Marlette Lake, or Mount Tallac.
Distances and difficulty ratings below are planning estimates. Snow, heat, smoke, construction, fallen trees, parking, altitude, and trail reroutes can change the experience. Check the managing agency and current trail conditions before leaving.
Choose a trail or season
For route-specific planning, compare Fallen Leaf Lake hiking, Marlette and Incline Flume trails and North Shore Rim Trail day hikes. Visiting before summer? Read hiking in April and May. Bringing a dog? Check dog-friendly trails and local rules before choosing an outing.
Access checks for October 25, 2026
These route descriptions are for hiking conditions without significant snow or ice. A trailhead listing is not proof of safe conditions along the entire hike. Check the route-specific access notes below, then the latest land-manager notices before departure.
Use the official links in each trail entry, then compare the outing with our Lake Tahoe conditions page. For spring trips, check the conditions at the trail’s elevation rather than assuming lakeshore weather applies to the upper route. Pick a shorter alternative near your lodging if the information is incomplete.
Find your hiking area
South: Rainbow, Big Meadow and Tallac. Emerald Bay: Vikingsholm, Eagle Lake and Rubicon. West: Eagle Rock, Page Meadows and Barker Pass. North: Picnic Rock and Tahoe Meadows. East: Spooner and Marlette.
The overview shows the lake’s geography. Each route panel links its starting point; these are location aids, not trail tracks. Save the TRTA route maps or the appropriate land-manager map before leaving cell coverage. A road pin does not confirm an open gate.
Reading the comparisons: distances are return totals unless explicitly marked one-way. Time ranges are our planning allowances for dry-trail walking and short pauses, not measured hiking times. Add driving, longer stops and your group’s needs. Climb estimates identify their source and route variant; historical trip records describe terrain, not current access. Where no matching figure is verified, the panel gives the climbing character instead.
Best Lake Tahoe Hikes at a Glance
Facility references: TRTA parking directory, Barker Pass facilities, Eagle Falls facilities, Big Meadow seasonal services, TRT dog guidance, Forest Service dog rules, and Tallac climb estimate.
| Hike and area | Distance, difficulty and views |
|---|---|
| Rainbow TrailArea: South Shore | Approximate distance: About 0.5 mile loopDifficulty: EasyBest feature: Accessible nature walk and Taylor Creek |
| Big MeadowArea: South of Tahoe | Approximate distance: 1.4 miles round tripDifficulty: EasyBest feature: Wildflowers and open meadow |
| Page MeadowsArea: West Shore | Approximate distance: 1.4 miles round tripDifficulty: Easy with an initial climbBest feature: Meadows, flowers, and fall color |
| Ophir Creek LoopArea: Tahoe Meadows | Approximate distance: 1.5 to 4.5 miles round tripDifficulty: EasyBest feature: Meadow and creek options |
| Spooner Lake LoopArea: East Shore | Approximate distance: About 2 milesDifficulty: EasyBest feature: Flat lake and aspen loop |
| Vikingsholm TrailArea: Emerald Bay | Approximate distance: 2 miles round tripDifficulty: ModerateBest feature: Emerald Bay and historic estate |
| Eagle RockArea: West Shore | Approximate distance: About 0.7 to 1 mile round tripDifficulty: ModerateBest feature: Short climb to a broad lake view |
| Picnic Rock VistaArea: North Shore | Approximate distance: 3 miles round tripDifficulty: Easy to moderateBest feature: Panoramic North Shore view |
| Eagle Falls to Eagle LakeArea: Emerald Bay | Approximate distance: About 2 miles round tripDifficulty: ModerateBest feature: Waterfall, granite, and alpine lake |
| Barker North VistaArea: West Shore | Approximate distance: 3.5 miles round tripDifficulty: ModerateBest feature: Tahoe and Desolation Wilderness views |
| Rubicon TrailArea: West Shore | Approximate distance: Variable, up to 7.4 miles one wayDifficulty: Moderate to strenuousBest feature: Long stretches beside Lake Tahoe |
| Marlette Lake via North CanyonArea: Spooner Backcountry | Approximate distance: About 10 miles round tripDifficulty: Moderate to hardBest feature: Backcountry lake and forest |
| Mount TallacArea: Southwest Shore | Approximate distance: About 10 miles round tripDifficulty: HardBest feature: High summit over the Tahoe Basin |
Easy Lake Tahoe Hikes
1. Rainbow Trail at Taylor Creek
Route planning: Rainbow Trail at Taylor Creek
Time budget: 30–60 minutes.
Climb: Flat paved loop; no numeric gain in the agency description.
Parking & toilets: Visitor-center parking is seasonal and free. Flush toilets during operations; none when closed. Bring water.
Dogs: Leashed pets on permitted trails; no pets in/near the marsh or inside the chamber.
Rainbow Trail is one of the easiest introductions to Tahoe’s natural environment. The roughly half-mile loop begins near Taylor Creek Visitor Center and passes forest, meadow, creek habitat, and the Stream Profile Chamber area. The trail is generally flat and is a practical choice for families, older visitors, and anyone adjusting to elevation.
Best for: Young children, short walks, nature interpretation, and visitors combining the trail with Kiva Beach or Tallac Historic Site.
Seasonal note: The trail can remain accessible when the visitor center building is closed, but snow, ice, restrooms, and services vary by season. Fall kokanee activity can attract heavy crowds and wildlife restrictions.
See our separate guide to easy Lake Tahoe hikes for families.
2. Big Meadow
Route planning: Big Meadow
Time budget: 1–1.5 hours.
Climb: Roughly 400 feet from Highway 89 up to the meadow, according to Jared Manninen’s Tahoe Trail Guide. This is an approximate climb for the shared approach, described in a winter report; it is not a fresh measurement of the full 1.4-mile summer outing. Expect the effort near the start.
Parking & toilets: Use the gated trailhead off Highway 89. Seasonal vault toilets; no winter restroom service. Cross the highway carefully.
Dogs: Dogs allowed on the TRT; keep leashed and follow posted local rules.
The Tahoe Rim Trail Association lists the short Big Meadow hike at about 1.4 miles round trip. The route crosses Highway 89, climbs briefly through forest and rocky terrain, and reaches an open meadow. Wildflowers can be strong in early summer, while snow may remain around the trailhead well after lower areas have melted.
Best for: A short meadow hike, wildflowers, and travelers driving between South Lake Tahoe and Hope Valley.
Important: Cross Highway 89 carefully and follow the Tahoe Rim Trail markers. Do not walk into fragile meadow vegetation.
3. Page Meadows
Route planning: Page Meadows
Time budget: 1–1.5 hours.
Climb: Initial uphill road segment; no numeric gain in the TRTA listing.
Parking & toilets: Limited roadside access on Ward Creek Boulevard. No toilet confirmed in the parking listing; use town facilities first.
Dogs: Dogs allowed on the TRT; keep leashed and stay out of fragile meadows.
The official Tahoe Rim Trail day-hike description lists a 1.4-mile round trip to Page Meadows from the Ward Creek Boulevard area. The route starts with a climb before reaching a series of interconnected meadows. It is popular for wildflowers and fall aspen color.
Best for: West Shore visitors, wildflowers, fall color, and a shorter outing away from the shoreline.
Important: Stay on established trails. Meadows are fragile, muddy conditions can cause damage, and route intersections can be confusing without a map.
4. Ophir Creek Loop at Tahoe Meadows
Route planning: Ophir Creek Loop at Tahoe Meadows
Time budget: 1–3 hours, depending on loop.
Climb: High-elevation meadow terrain with several loop choices; gain varies with the chosen loop.
Parking & toilets: Tahoe Meadows trailhead off Mount Rose Highway; seasonal toilets. Summer opening reports do not confirm October facilities.
Dogs: Dogs allowed on the TRT; keep leashed around other users and on narrow paths.
Ophir Creek offers several loop choices, allowing hikers to turn a short outing into a longer meadow walk. The Tahoe Rim Trail Association lists options ranging from about 1.5 to 4.5 miles round trip. The route follows meadow and creek terrain beneath Mount Rose.
Best for: Wildflowers, flexible distance, families comfortable with uneven trail, and North Shore visitors.
Altitude note: Tahoe Meadows is much higher than the lake. Even an easy trail can feel harder to someone arriving from low elevation. Weather can also be colder and windier than conditions in Incline Village.
5. Spooner Lake Loop
Route planning: Spooner Lake Loop
Time budget: 1–1.5 hours.
Climb: Agency describes a flat two-mile loop; not zero effort at altitude.
Parking & toilets: Developed park entrance: $10 NV / $15 non-NV vehicle. Restrooms and drinking water listed; verify seasonal operation.
Dogs: Pets allowed on a leash no longer than six feet.
Nevada State Parks describes a flat, approximately two-mile trail around Spooner Lake. The route passes forest, meadow, aspen, and lake habitat and is one of the most approachable hikes on the Nevada side.
Best for: A relaxed nature walk, fall color, families, and hikers who want a defined loop.
Access check, October 25: the park’s dock-construction notice says the lake loop remains open, but its expected August completion date is not confirmation that work finished. The live park page also lists a harmful-algal-bloom watch. Avoid construction areas and check current signs; the longer Marlette route has a separate notice conflict below.
Check Spooner Lake alerts and current conditions.
Short Hikes With Big Views
Looking for a viewpoint near Incline Village? Our Monkey Rock hiking guide covers the uphill route from Tunnel Creek Road, parking and a trail map.
6. Vikingsholm Trail
Route planning: Vikingsholm Trail
Time budget: 1.5–2.5 hours, excluding house tour.
Climb: About 400–500 feet back up, reflecting differing State Parks figures.
Parking & toilets: Use the signed Emerald Bay/Vikingsholm lot. Restrooms at the bottom year-round; no drinking water October–May.
Dogs: Dogs prohibited on the trail; leave pets with suitable care.
Before choosing this hike, use our Emerald Bay State Park guide to plan parking, check Vikingsholm tour dates and allow time for the uphill return.
The Vikingsholm Trail is one mile down and one mile back. The Vikingsholm page lists 400 feet of return gain, while the Emerald Bay page describes a 500-foot descent. Plan for a substantial 400–500-foot climb back to the car; neither figure makes it a flat walk.
Best for: Emerald Bay views, history, shoreline access, and visitors who understand that the return is uphill.
Difficulty warning: This is not a flat two-mile walk. The trail is steep, exposed in places, and can be icy in winter. State Parks warns that visitors with mobility limitations or certain medical conditions should not attempt it. There are no public rides back up.
Review current Vikingsholm access and tour information.
7. Eagle Rock
Route planning: Eagle Rock
Time budget: 45–75 minutes.
Climb: About 240 feet for the short 0.7-mile out-and-back in OutGrown’s contributor route listing. Treat this as a planning estimate for the short viewpoint route, not the longer loop. The upper ground is rocky.
Parking & toilets: Improved parking immediately south of Eagle Rock off Highway 89. No toilet confirmed by the managing-agency page.
Dogs: Dogs are welcome according to Visit Lake Tahoe’s Eagle Rock listing. Keep your dog leashed on the narrow trail and near the rocky edge, and follow posted restrictions. The tourism page and other trail directories differ on off-leash wording; this guide does not promise an off-leash area.
Eagle Rock is a short West Shore climb near Homewood that reaches an exposed volcanic outcrop with a broad view of Lake Tahoe. The hike is usually under one mile round trip, but the climb is rocky and steeper than the short distance suggests.
Best for: A fast scenic stop, sunset planning when conditions are safe, and hikers comfortable on loose rock.
Parking: Parking is limited along Highway 89. Do not create a traffic hazard or block private property. If the legal parking area is full, use another hike rather than improvising.
8. Picnic Rock Vista
Route planning: Picnic Rock Vista
Time budget: 2–3 hours.
Climb: Plan for roughly 740 feet of ascent. Tahoe Meg’s documented 2020 outing lists 740 feet over 3.2 miles return, including the short dirt-road approach; TRTA rounds the hike to three miles. Parking position and track endpoints affect totals. Follow the Vista spur, not a sign necessarily saying Picnic Rock.
Parking & toilets: Limited Brockway East spaces; use caution at Highway 267. No toilet confirmed in the TRTA parking listing.
Dogs: Dogs allowed on the TRT; keep leashed at the busy trailhead and viewpoint.
The Tahoe Rim Trail Association lists Picnic Rock as a three-mile round trip from Brockway Summit East. The trail climbs steadily through forest before reaching a signed vista spur near a rock outcrop. The overlook provides a wide view across the lake and Sierra.
Best for: North Shore views, a half-day outing, and hikers who want a meaningful climb without an all-day summit.
Planning note: The association classifies it as easy, but the steady uphill and elevation can make it feel moderate. Bring water and navigation because the viewpoint uses a spur from the main trail.
Moderate Lake Tahoe Hikes
9. Eagle Falls to Eagle Lake

Route planning: Eagle Falls to Eagle Lake
Time budget: 1.5–2.5 hours.
Climb: About 400 feet for the two-mile return to Eagle Lake, based on Greg Lamy’s mapped 2014 trip. This historical route estimate covers the lake outing, not a longer trip to the Velmas. Granite steps and uneven footing still make it more demanding than a paved two-mile walk.
Parking & toilets: Seasonal fee lot and restrooms at Eagle Falls. TRTA currently lists $5 for the internal lot; verify posted rate.
Dogs: Leashed dogs permitted on Forest Service trails; nearby Emerald Bay State Park has different rules.
Planning around waterfall scenery? Compare five Lake Tahoe waterfall outings, including the short Upper Eagle Falls stop, Cascade Falls, Lower Glen Alpine Falls, Shirley Canyon and Galena Falls, with maps and parking notes.
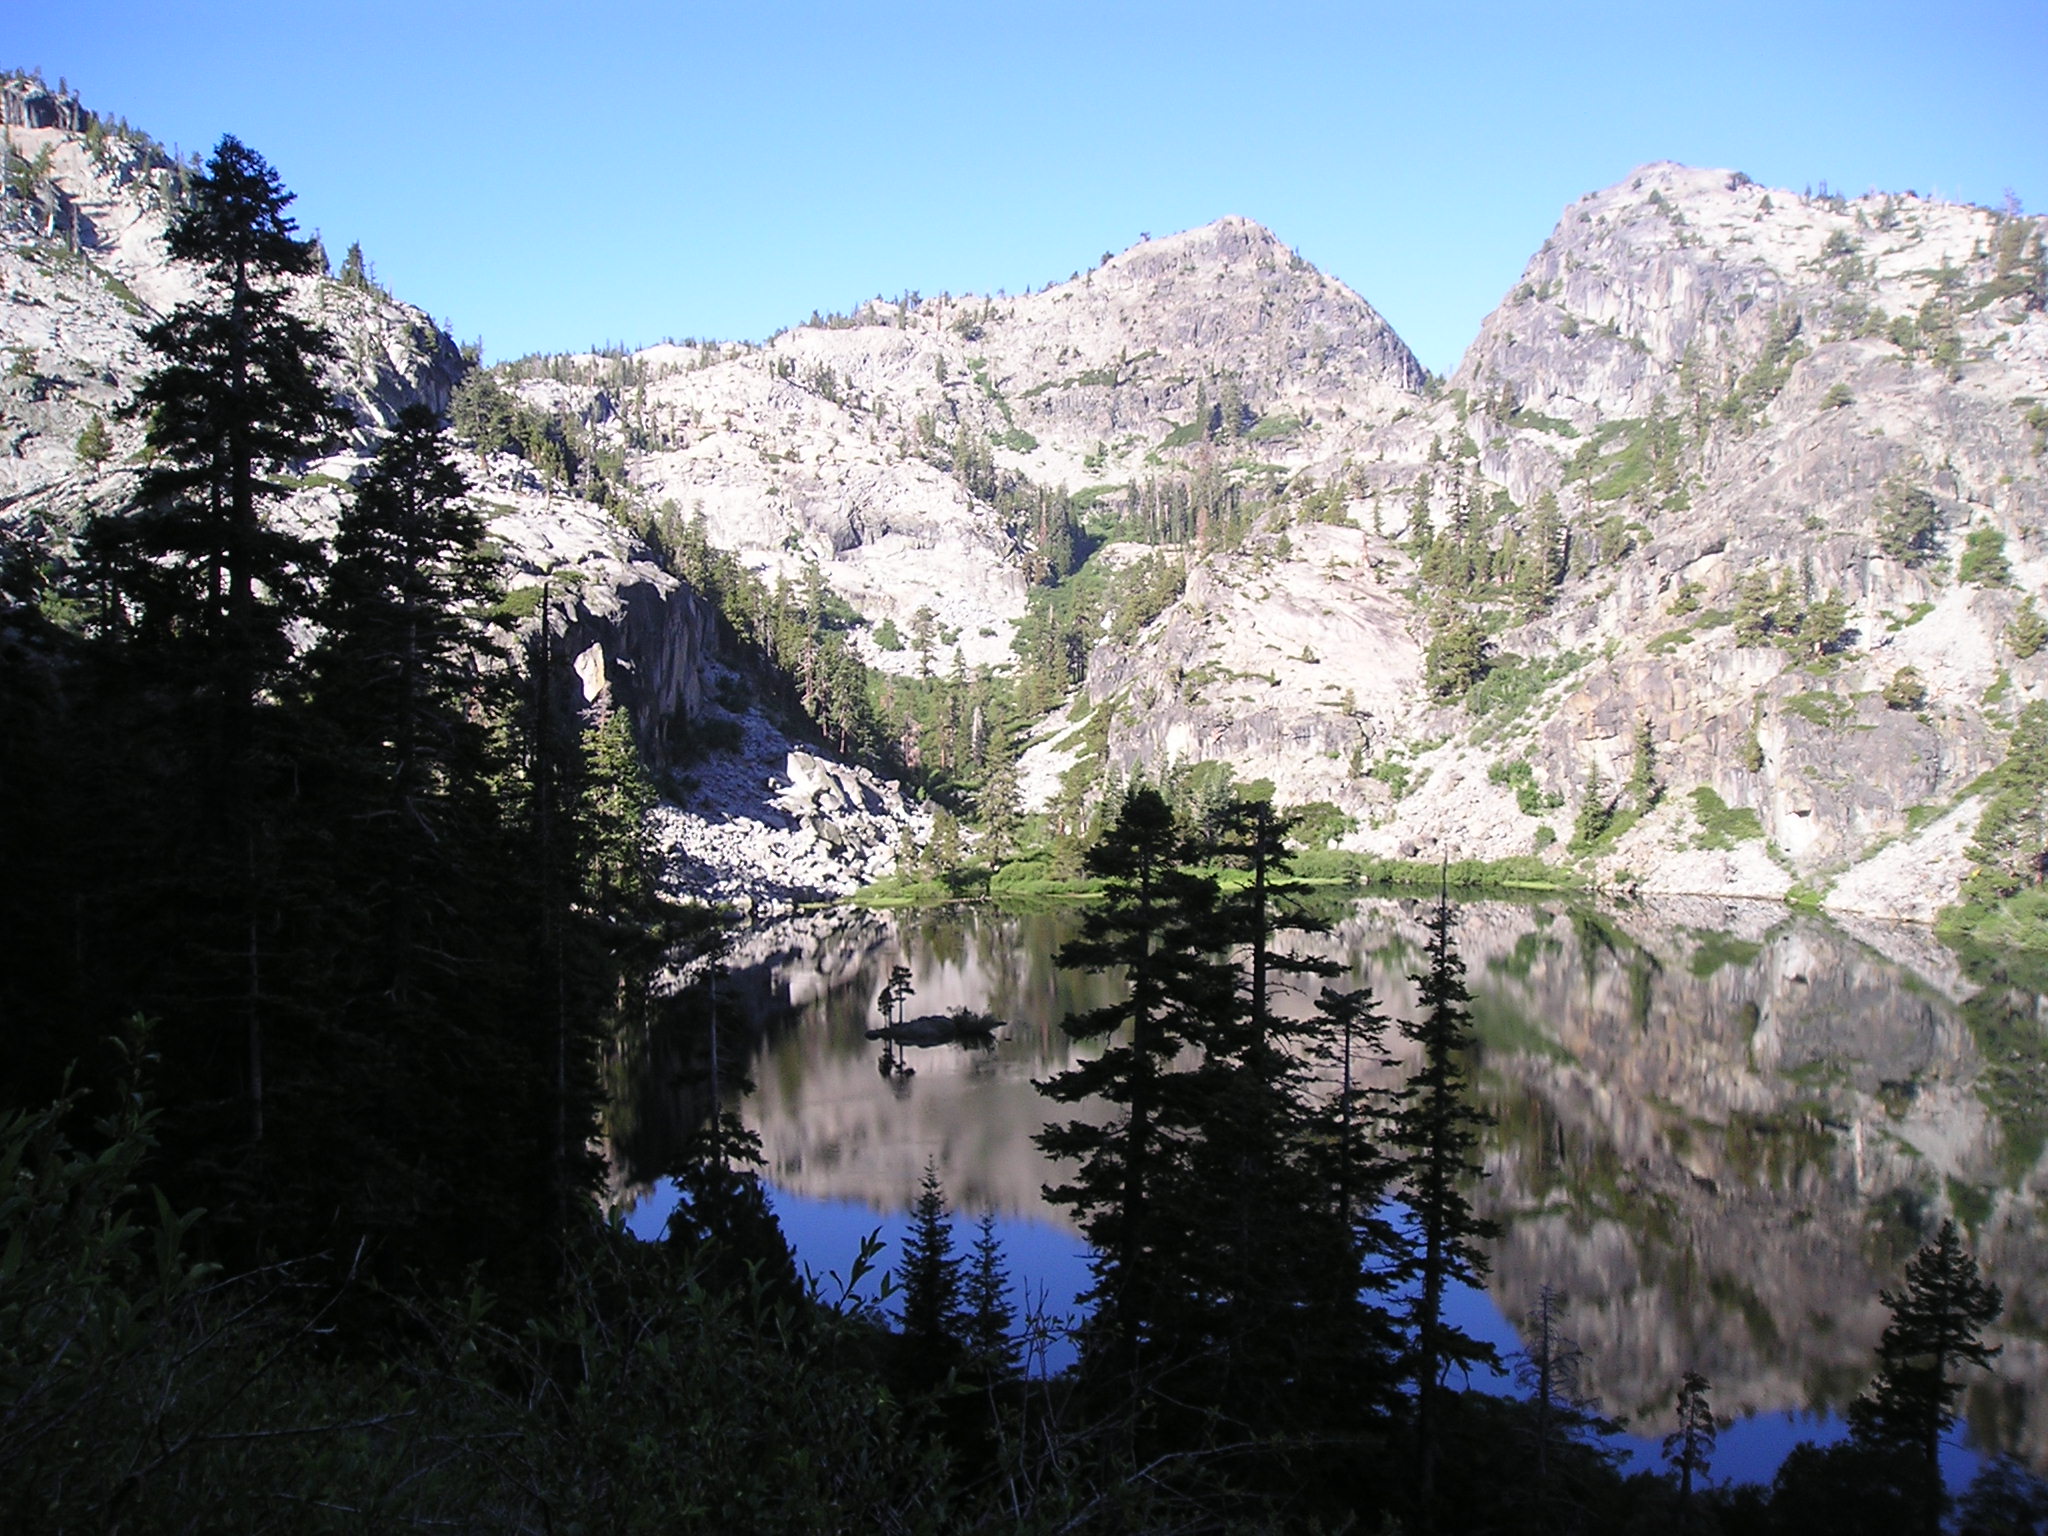
This popular route begins near Emerald Bay, passes the Eagle Falls area, and climbs through granite toward Eagle Lake in Desolation Wilderness. The common out-and-back is about two miles, but stairs, rock, altitude, heat, and crowding can make it more demanding than the distance implies.
Use our Eagle Lake Trail guide for parking, trail distance and the wilderness day-permit steps before you set out.
Best for: Waterfall scenery, granite terrain, a short alpine-lake destination, and hikers comfortable with climbing.
Permit: Desolation Wilderness requires a free day-use permit year-round. Recreation.gov directs day hikers to a local Forest Service office or trailhead supplies in summer. Do not assume a self-issue box will be stocked off-season. Overnight permits are separate; the overnight quota season runs from the Friday before Memorial Day through September 30.
Parking: The small lots and roadside spaces near Emerald Bay fill early. Park only in legal spaces and never walk in a traffic lane.
Review current Desolation Wilderness permit rules.
10. Barker North Vista
Route planning: Barker North Vista
Time budget: 2–3 hours, only after access confirmation.
Climb: Moderately steep open slopes; no numeric gain in the TRTA day-hike listing.
Parking & toilets: Dirt lot beyond the paved-road end; seasonal access. PCTA lists a vault toilet, no trash service.
Dogs: Dogs allowed on the TRT; leash and control rules vary by jurisdiction.
The Tahoe Rim Trail Association lists Barker North Vista at 3.5 miles round trip. The route travels through open slopes and forest near Barker Pass, with views toward Lake Tahoe and Desolation Wilderness and seasonal wildflowers.
Best for: West Shore hikers, wildflowers, open views, and a moderate outing away from major tourist stops.
Access check, October 25: the TRTA conditions page still displays a Talbot Fire closure banner for Barker Pass–Twin Peaks, while its segment text dates to July. The old Forest Service Talbot alert no longer resolves, and the current forest alert list does not list that order. Those mixed signals are not a confirmed opening. Verify with the land manager before choosing this route; Barker Pass Road also has seasonal snow closures.
11. Rubicon Trail


Route planning: Rubicon Trail
Time budget: Choose a turnaround budget; no single duration fits all starts.
Climb: Repeated shoreline ups/downs plus the access climb. Total gain depends on start and turnaround.
Parking & toilets: Use a legal trail access. D.L. Bliss vehicle closure adds walking and removes its off-season toilets/water.
Dogs: Dogs prohibited on the Rubicon Trail.
The Rubicon Trail follows the shoreline between D.L. Bliss State Park and Emerald Bay State Park. California State Parks lists four primary access points and about 7.4 miles from the north end at Calawee Cove to Eagle Point Campground. The full one-way route requires transportation planning, while shorter out-and-back sections work for many day hikers.
The current park page and May 2026 information sheet give different trail totals. Use our Rubicon Trail hiking guide to compare those estimates, choose an access point and include the walks between parking and the shoreline in your return plan.
Best for: Lake-level scenery, granite shoreline, Emerald Bay, D.L. Bliss, and hikers who want a flexible distance.
Difficulty: State Parks describes the route as moderate to strenuous. Distance, elevation changes, heat, limited water, and the need to retrace the route can turn a casual plan into a long day.
Access checked October 25, 2026: D.L. Bliss is closed to vehicles from October 1. The visitor-center approach is about one mile to the nearest Rubicon access, versus roughly two steep miles to the beaches. Budget the return approach too. Off-season toilets and water are unavailable there; dogs are prohibited on the Rubicon Trail.
Check Emerald Bay and Rubicon Trail updates.
Long and Difficult Lake Tahoe Hikes
12. Marlette Lake via North Canyon
Route planning: Marlette Lake via North Canyon
Time budget: 5–7 hours, only after access confirmation.
Climb: For the hiking-trail option, budget about 1,650 feet of total ascent: Trailhiker’s mapped 2019 outing follows North Canyon Road for about 0.9 mile, then the parallel Marlette Lake hiking/equestrian trail. This is a historical track estimate, not an agency measurement or the all-road bike route. The roughly 300-foot descent into the lake basin becomes a climb on the return; the outing is not all downhill after the lake.
Parking & toilets: Begin at Spooner Lake park entrance, not Spooner Summit. Same vehicle fee as the lake loop; use facilities before leaving.
Dogs: Pets allowed on a leash no longer than six feet.
Nevada State Parks describes the route from Spooner Lake to Marlette Lake via North Canyon Road as five miles one way. That makes a basic out-and-back roughly ten miles. A parallel hiker and horse trail follows much of the road, and the route climbs steadily into the backcountry.
Best for: Strong hikers, forest scenery, backcountry lake views, and a longer day on the Nevada side.
Closure evidence checked October 25: the current State Parks project page now specifies weekday 5 a.m.–6 p.m. closures on Lakeview, Franktown Creek and Pipeline roads for Hobart work, with residual Marlette work possible. It does not repeat the older blanket North Canyon closure. However, the wildlife agency page still describes broader weekday closures. Call Spooner Lake at 775-749-5980 to confirm North Canyon/Marlette access for your day. Do not infer unrestricted access from either an old closure or its omission on a newer page.
Read the latest Spooner backcountry closure schedule.
13. Mount Tallac


Route planning: Mount Tallac
Time budget: 7–10 hours in suitable hiking conditions.
Climb: More than 3,200 feet of climbing, per Travel Nevada; exposed rocky terrain above the lakes.
Parking & toilets: Turn onto Mt. Tallac Road opposite Baldwin Beach. Seasonal parking; no potable water. Current toilet availability is not confirmed.
Dogs: Leashed dogs permitted on Forest Service trails, but assess paw protection, heat and ability to return.
October access: the Forest Service fuels-work notice schedules operations off Mt. Tallac Road through the end of October, subject to conditions. Expect possible delays and temporary access disruption; avoid machinery and active work areas.
Mount Tallac is one of the Tahoe Basin’s signature summit hikes. The common out-and-back is about ten miles with more than 3,000 feet of elevation gain and a summit above 9,700 feet. It crosses exposed granite and enters Desolation Wilderness.
Use our Mount Tallac hiking guide to find the trailhead, plan the 10-mile summit round trip and understand the summer day-permit process. It also compares shorter turnarounds at Floating Island Lake and Cathedral Lake.
Best for: Experienced, well-prepared hikers seeking a demanding all-day summit and expansive Tahoe views.
Not for beginners: Snow can remain into summer. Heat, lightning, route-finding, altitude, loose terrain, and the long descent all matter. Start early, turn around when conditions deteriorate, and do not treat the summit as guaranteed.
Permit: A Desolation Wilderness day-use permit is required. Overnight trips use the quota system, and hard-sided bear-resistant canisters are required for overnight wilderness visitors under current rules.
Three ways to build a realistic hiking day
One-hour South Shore nature stop
Start with Rainbow Trail if legal parking, surfaces and seasonal services suit your group. Budget 10 minutes to park and orient, 35 minutes for the half-mile nature loop and 15 minutes for pauses and returning to the car. This leaves little room for a long chamber visit or an additional beach walk.
If the gate or conditions prevent the outing, switch to a town visit rather than improvising parking on Highway 89. Big Meadow is not an equivalent fallback for a group needing paved surfaces: it adds a highway crossing, rocky climbing and higher elevation.
Half-day view: Picnic Rock versus Vikingsholm
Choose Picnic Rock when you are staying on the North Shore and want the climb first. Choose Vikingsholm from a suitable West/South Shore base when everyone can manage the climb at the end. Allow roughly three hours after arrival, including time to orient and take breaks; a house tour adds time and depends on its season.
Two miles at Vikingsholm can be harder for someone with limited uphill stamina than the number suggests. For a shorter West Shore viewpoint, Eagle Rock reduces mileage but still requires rocky footing. If that does not suit the group, use the overlook at a legal parking area without descending.
Tallac: choose a lake turnaround before a summit attempt
From the main Tallac trailhead, Floating Island Lake is 1.7 miles each way: 3.4 miles return. Cathedral Lake is 2.5 each way: 5 miles return. The summit is approximately five each way: 10 miles return. Reaching Cathedral is only halfway through the summit’s outward mileage, with the steeper section still ahead.
For example, if your group’s full-day budget is eight hours, do not interpret four hours outward as an automatic summit allowance. Set an earlier turnaround based on daylight, conditions and the slowest hiker, and keep time in reserve for the descent. A lake destination can be the intended success, not a failed summit. Check permits and Mt. Tallac Road work first.
Rubicon distance trap: a 7.4-mile one-way route becomes 14.8 miles if you retrace it, before any additional parking approach. For a two-hour outing, choose a short section with an early turnaround; do not begin a full traverse without confirmed return transportation.
How to Choose the Right Tahoe Hike
For Young Children or a Very Easy Walk
Start with Rainbow Trail or Spooner Lake Loop, subject to current access. Big Meadow and Ophir Creek can work for active families comfortable with uneven trail and elevation. For more options, use our family hiking guide.
For a Short View Hike
Eagle Rock is the shortest dramatic viewpoint, while Picnic Rock offers a longer climb and wider North Shore panorama. Vikingsholm provides Emerald Bay scenery but requires a steep return climb.
For Lake-Level Scenery
Choose a section of the Rubicon Trail. Decide the turnaround point before starting and save enough water and energy for the return.
For an All-Day Challenge
Mount Tallac is the classic summit choice. Marlette Lake offers a long backcountry day with less summit exposure, but 2026 construction closures require careful checking.
TRT food-storage rule: the association’s current regulations require approved hard-sided bear canisters for food and scented items throughout the TRT system. Do not assume the separate Desolation overnight rule is the only storage rule affecting a day route.
Permits and Fire Rules
- Day hikers entering Desolation Wilderness need a free day-use permit.
- Overnight Desolation Wilderness trips require a quota permit.
- Current rules require overnight wilderness visitors to store food and scented items in a hard-sided bear-resistant canister.
- Campfires are generally prohibited outside designated developed campgrounds.
- A California Campfire Permit is required for many gas or liquid-fuel stove uses, but restrictions can prohibit stove use during extreme fire conditions.
- Wood-burning and twig stoves are prohibited across the Tahoe Basin.
Check current Tahoe Rim Trail permit and fire guidance before a backcountry trip.
Lake Tahoe Hiking Safety
- Check the exact trail: A clear shoreline forecast does not describe a summit or mountain pass.
- Carry the ten essentials: Navigation, light, sun protection, first aid, knife or repair items, fire-safe emergency supplies, shelter, extra food, extra water, and extra clothing.
- Download maps: Cell service is unreliable in canyons and wilderness areas.
- Tell someone: Share the route, vehicle, trailhead, turnaround time, and expected return.
- Start early: This helps with heat, parking, afternoon storms, and daylight.
- Altitude: do not push higher through headache, nausea or unusual fatigue. Worsening symptoms require descent; confusion, loss of coordination or breathlessness at rest require urgent help. See the CDC altitude guidance.
- Lightning: plan to leave exposed terrain before storms arrive. If thunder begins, seek a substantial building or enclosed hard-top vehicle; no outdoor spot is fully safe. Read the National Weather Service guidance.
- Respect snow: A summer date does not guarantee a snow-free trail. Do not cross steep snow without the training and equipment to manage a fall.
- Store food: Use bear-resistant storage where required and never leave food in an unattended pack.
- Turn around: A safe turnaround is a successful hike.
Check current Tahoe Rim Trail conditions, the managing park or Forest Service page, and our Lake Tahoe weather guide before leaving.
Parking and Trailhead Etiquette
- Use designated legal spaces and never block emergency access, bike lanes, driveways, or traffic.
- Do not create a new parking area on vegetation or soft shoulders.
- Have a backup hike nearby when a trailhead is full.
- Do not leave food, coolers, scented items, or visible trash in the vehicle.
- Pack out all trash, including food scraps and pet waste.
- Stay on durable trail surfaces and avoid cutting switchbacks.
- Yield according to posted multi-use trail rules.
Frequently Asked Questions
What is the best easy hike in Lake Tahoe?
Rainbow Trail is one of the easiest short nature walks. Spooner Lake Loop, Big Meadow, Page Meadows, and Ophir Creek are also approachable, but altitude, snow, and current closures can change their difficulty.
What hike has the best Lake Tahoe view?
Mount Tallac offers a major summit panorama for experienced hikers. Picnic Rock and Eagle Rock provide broad lake views with much shorter distances. The Rubicon Trail provides continuous shoreline scenery rather than a single overlook.
Do Lake Tahoe hikes require permits?
Many day hikes do not require a trail permit. Day use in Desolation Wilderness requires a free permit, while overnight wilderness trips use a quota system. State parks can also charge day-use or parking fees.
Can you hike in Lake Tahoe in winter?
Some lower trails remain accessible, but snow and ice can transform an ordinary hike into a mountaineering problem. Check avalanche forecasts, road closures, weather, and equipment needs. Do not follow a summer route description as a winter safety plan.
Are dogs allowed on Tahoe trails?
Rules vary. Dogs are prohibited on the Rubicon Trail within Emerald Bay State Park and at many designated beaches. Some National Forest and Tahoe Rim Trail routes allow leashed dogs. Check the exact land manager and posted signs.
How much water should I carry?
The amount depends on heat, distance, altitude, exposure, and personal needs. Carry more than you expect to drink, and do not rely on untreated creeks or lakes. Backcountry water must be treated and may be unavailable.
Plan the Rest of Your Tahoe Trip
- Easy Lake Tahoe hikes for families
- Best beaches in Lake Tahoe
- Lake Tahoe weather by month
- Lake Tahoe itineraries
- Lake Tahoe live cameras
- Where to stay in Lake Tahoe
How this hiking guide was checked
We compare routes by the effort, access and facilities that affect a visitor’s choice, using land managers, trail associations and linked regional sources. The editorial team checked these pages on October 25, 2026. Source dates are not trail inspections: several TRTA segment reports still date to June or July. Known conflicts are identified beside the affected routes.
Times and comparison scenarios are editorial planning examples. We have not claimed a recent field visit or GPS survey. Clearly attributed historical trip records supplement agency descriptions for climb estimates; Page Meadows and Barker North Vista still lack verified numeric gains for the exact short routes described here. Photographs are credited illustrations, not current snow or access reports. Send corrections through our contact page.